Split parcels
Manage parcel splits from a parcel record.
You can create parcel splits in CAMA using two different methods:
- Import split data from a file
- Enter split data manually in the system
Prerequisites
Edit Parcel Splits permission is required to split parcels.
Download an Excel template
To create a worksheet to import split data, you can download a worksheet template from CAMA.
- Go to the appropriate parcel.
- Select the down arrow next to Split.
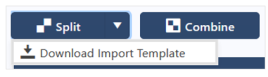
- Select Download Import Template.
The Excel template is downloaded to your computer, and you can open it and enter information in the file.
After entering split data in the file, you can import it to CAMA.
Import parcel split data
Import data from an Excel file.
- Go to the appropriate parcel.
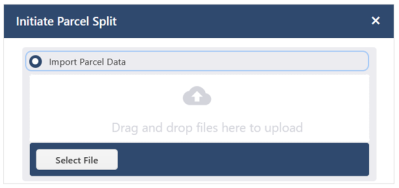
- Select Split.
- Select Import Parcel Data.
- Select the worksheet to upload using one of the following methods:
- Drag and drop the file in the box.
- Select the Select File button to browse and select the file.
- Select Import.
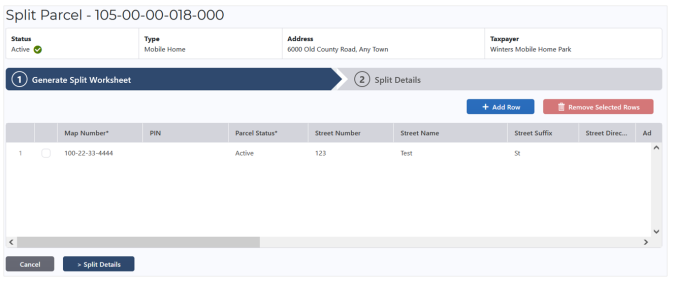
The system generates a worksheet using the imported data.
-
Edit the worksheet as needed.
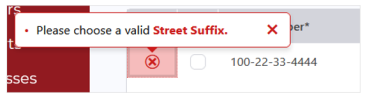
If a required field is empty or populated incorrectly, a red exclamation icon displays on the row and an error message displays at the bottom of the screen.
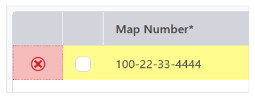
Select the icon for information about the error.
- To populate or edit a field, double-click it, then enter the appropriate information.
- To add a row, select Add Row, then enter information in the fields.
- To remove rows, select the checkboxes for the appropriate rows, then select Remove Selected Rows.
- After adjusting the information, select Split Details to go to step 2.
- Populate the fields.
- Inactivate Original Parcel (optional): To make the parcel inactive, select the Inactivate Original Parcel checkbox.
- Set Parcel Inactive Status To:
Select a status for the inactive original parcel.
Note: This field only displays if Inactivate Original Parcel is selected.
- Effective Year (optional): Enter the effective year. Defaults to the current year.
Note: The Tax Assessment Year is the Effective Year + 1. For example, if 2024 is selected for the Effective Year, the first Tax Assessment Year will be 2025.
- The Copy and Create New Tax Assessment Year YYYY (the Effective Year + 1) header displays if the parcel has at least one District/Area or one Fee that can be copied.
Select the checkbox for a District/Area or Fee to copy them from the parent parcel.
- Notes (optional): Enter any notes to apply to the created split parcel, up to 4,000 characters.
-
After populating the fields, select Create Parcels.
The new split parcel is created. If you chose to inactivate the original parcel, the parcel now has an Inactive status.
The original parcel's Overview tab displays the new split parcel in the Associated Parcels panel.
Enter parcel splits data manually
You can also manually enter split data in CAMA.
- Go to the appropriate parcel.
- Select Split.
- Select Generate Worksheet.
- For Number of New Parcels, enter the number of new parcels to create.
- Select Generate.
- Populate the fields for each new parcel.
Double-click a field to populate it.
-
Add or remove rows as appropriate.
-
To add a row, select Add Row, then enter information in the fields.
- To remove rows, select the checkboxes for the appropriate rows, then select Remove Selected Rows.
- After populating the fields, select Split Details to go to step 2.
- Populate the fields.
- Inactivate Original Parcel (optional): To make the parcel inactive, select the Inactivate Original Parcel checkbox.
- Set Parcel Inactive Status To:
Select a status for the inactive original parcel.
Note: This field only displays if Inactivate Original Parcel is selected.
- Effective Year (optional): Enter the effective year. Defaults to the current year.
Note: The Tax Assessment Year is the Effective Year + 1. For example, if 2024 is selected for the Effective Year, the first Tax Assessment Year will be 2025.
- The Copy and Create New Tax Assessment Year YYYY (the Effective Year + 1) header displays if the parcel has at least one District/Area or one Fee that can be copied.
Select the checkbox for a District/Area or Fee to copy them from the parent parcel.
- Notes (optional): Enter any notes to apply to the created split parcel, up to 4,000 characters.
-
After populating the fields, select Create Parcels.
The new split parcel is created. If you chose to inactivate the original parcel, the parcel now has an Inactive status.
The original parcel's Overview tab displays the new split parcel in the Associated Parcels panel.