Create roles and assign permissions
User permissions are managed using Roles. A role is a set of permissions that can be created using any criteria; you might create roles based on job titles, such as Assessor or Clerk, or by general access rights, such as Administrator or SuperUser.
Roles are created for each application individually. These permissions determine what pages and records users can access and edit in an application. For example, you may have an IT department that will create and manage user accounts but shouldn't view records in CAMA. To address this, you could create a role in System Administrator that would allow the user to manage user accounts and permissions. To prevent them from accessing CAMA, you can choose not to assign a role to that user for CAMA.
A role's permissions and access times apply to each assigned user. However, you can adjust access times for individual users when you assign their Roles. Learn more: Assign roles to users
Prerequisites
Edit User Roles permission is required to create and assign user roles for an application.
For example, to assign a user a role in CAMA, you must have Edit User Roles permission for CAMA.
Create a role
Create a new role for an application. The role's permissions and access times apply to all users given the role.
-
From the left-side navigation, select Settings > Roles.
-
For Application, select the app to create a role for.
-
Select Create a Role.
-
Populate the fields for Step 1.
-
Role Name: Enter the name of the role.
-
Description (optional): Enter a short description of the role.
-
Access Times: Select when assigned users should be able to access the application.
-
Any Time: Users with this role can always access the application, regardless of day or time.
-
Set Hours: Users with this role can only access the application during specified hours.
If you select Set Hours, select the days on which the user can access the application, and enter time ranges for those days.
Note: Holiday access applies to holidays set in the Holiday Calendar.
-
-
Select Next to go to Step 2.
-
Select the checkboxes for the Permissions for the role.
-
To search for a permission or category, enter a keyword in the Filter field.
-
To select a specific permission, select the triangle sign next to the permission category, and then select the desired permission.
-
Administer/Administrator permissions allow users to create, view, edit, and delete a record.
-
View permissions allow users to see a record but block them from making changes.
-
Edit permissions allow users to view, create, and edit a record.
-
-
To learn more about permissions, go to the Role permissions guide.
-
Select Create Role.
You can now assign users to the new role.
Copy a role
Make an exact copy of an existing role. Copying a role can help you save time if creating multiple roles with only minor differences.
-
From the left-side navigation, select Settings > Roles.
-
Locate the appropriate role panel and select Copy.
-
Populate the fields.
-
For Role Name, enter a name for the new role.
-
Adjust any information and permissions as needed.
For more information, see the Role permissions guide.
-
Select Save.
The copy is created.
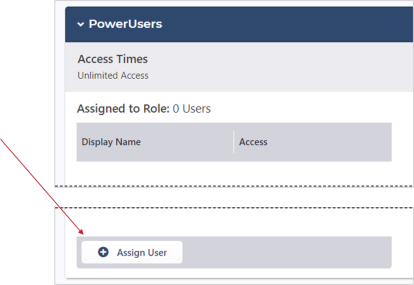
Assign users to a role
After creating a role, you can assign users to give them appropriate access levels in the application.
-
From the left-side navigation, select Settings > Roles.
-
Expand the panel for a role.
-
Select Assign User.
-
Populate the fields.
-
User: Enter or select the user to assign.
-
Display Name: Enter the name to display when the user makes changes in the application.
Example: Some offices may display Employee ID numbers instead of names.
-
Session Time Out: Select the length of inactive time before the user is automatically logged out.
Example: If Session Time Out is set to 15 minutes, the user will be logged out after not using the application for 15 minutes.
-
Access Expires (optional): Enter or select the date the user's access will expire. The user won't be able to access the application after this date.
-
Access Times (optional): Select when the user should be able to access the application.
-
Use Predefined: Use the default access times for the role.
-
Any Time: Allow the user to access the application any time, on any day.
-
Custom Hours: Set custom access hours for the user.
If you select Custom Hours, select the checkboxes for the desired days, and then enter the access hours.
-
-
Select Save.
The user is assigned to the role. Repeat the steps to assign more users if needed.