BR> Utilities> Enter Checks
Create a Check
Summary
The Enter Checks process is generally used to enter slipped
checks or outstanding checks from a previous software package into the Bank
Reconciliation module. The created checks will only display in the Bank
Reconciliation module and will not create a transaction in any other Springbrook
module. For example, if you create a check for an Accounts Payable module
vendor, the check will not display on the AP History tab of the Vendor
Maintenance window (AP> Maintenance> Vendor> AP History tab).
Checks created using this process must be associated with either a Payroll
module employee (PR> Maintenance> Employee), or an Accounts Payable
vendor (AP> Maintenance> Vendor).
If a manually entered check should be voided, return to
the Enter Checks Maintenance window and check the Void toggle to void a
check.
After the check has been created, it can be cleared using
the Clear Transactions process (BR> Clear Transactions). This will clear
the check and affect the balance of the bank account where the check is drawn.
Click here for
information onthe Clear Transactions process. Once the checks
have been cleared, they will not display in the Check Maintenance window (BR>
Utilities> Enter Checks). Checks created using this process will not display on the Detail Disbursement
Report (BR> Reports> Detail Disbursement), Uncleared Checks by Fund Report (BR>
Reports> Uncleared Checks by Fund) and Board Audit Report (BR> Reports> Board
Audit Report).
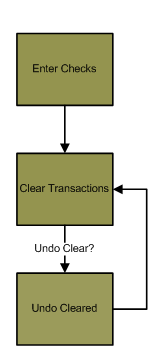
Flowchart
The objects in the diagram represent processes in the application. Click on an object for information about a process.
Related Links
Click here for information on the Clear Transactions process.
Step by Step
1 Open the Checks Maintenance window (BR>
Utilities> Enter Checks). 
- The Checks Maintenance window will display all checks that have been
entered into the window, but have not been cleared using the Clear
Transactions process (BR> Clear Transactions). Once the checks entered into
the Checks Maintenance window have been cleared, they will be removed from
the window.
- Select a check and click the Void toggle to void a check.
- Highlight a check and press DELETE to delete a check.
- Press INSERT to create a new check.
2 Create the check.
- Click the Bank Account field label to select the bank account on the check. The check
will be drawn from this bank account.
- Bank accounts are created in SS> Maintenance> Bank Account.
- The Account Number number field will populate with the bank account number of the bank account
selected in the Bank Account field. The Account Number
field will not be enabled. The bank account number can only be modified from the
Bank Account Maintenance window (SS> Maintenance> Bank Account).
Click here
for information on bank account maintenance.
- Enter the check number of the check in the Check Number field. An information
window will display if the selected check number has already been used for the
selected bank account.
- If you receive the information window, you can run the Checks by Date Report (BR> Reports>
Checks by Date) to view the check information of the check that has already been
entered.
- Enter a check date in the Check Date field.
- Enter the check amount in the Amount field.
- When creating an outgoing wire transfer, enter the amount as a negative value.
- Enter a description of the check in the Comment field. This is not a required
field.
- The Comment field will display on the Select Transactions to Clear window (BR> Clear
Transactions> Select Transactions), Clear Transactions Proof List (BR> Clear
Transactions> Proof List), Checks by Date Report (BR> Reports> Checks by Date),
and the Bank Activity Report (BR> Reports> Bank Activity Report).
- Select the type of entity the check is being written to in the Check To drop-down
menu. The selection in this field will determine the functionality of the field
below it.
- Select Vendor if the check if being writing to an Accounts Payable module vendor. This will
change the field label of the field below to Vendor Number.
- Select Employee if the check is being written to an employee. This will change the field label
of the field below to Employee Number.
- The field below the Check To field is used to select the AP module vendor or
Payroll module employee depending on the selection in the Check To field. Click
the field label (Employee Number, or Vendor Number) to select a Payroll employee
or vendor number from a list.
- Payroll employees are created and maintained using the Employee Selection window (PR> Maintenance>
Employee).
- Accounts Payable vendors are created and maintained using the Vendor Selection window (AP>
Maintenance> Vendor).
- Check the Void toggle if the check has been voided.
- Click the Save icon
 when complete.
- The manually entered check will display in BR> Clear Transactions> Select Transactions and
will have to be cleared in that process.
Springbrook Software
® All Rights Reserved 2017
Toll Free Support 866-777-0069